
Our vent cover is suitable for UK air bricks and similar-sized holes to prevent rodents* and insects from gaining access to cavities. The vent cover is straightforward to install and requires no previous experience; if using adhesive as the primary fixing method, it is, however, essential to use the correct material and prepare the area to grab the intended surface fully.
We recommend installing our vents with the enclosed fixings as this provides a permanent application; alternatively, the adhesive is an appropriate and simple method but is more vulnerable to failure if the adhesive is not applied correctly; in some circumstances, such as when installing on sandstone, bitumen or lead that adhesive should be avoided. We always recommend a flexible low-modular (LMN) or polymer-based outdoor weather adhesive; in particular we have found that Soudal Fix All Crystal has a high strength grab whilst being able to cope with the fluctuations of British temperature. Installers should avoid instant grab adhesives as they offer lower flexibility once dry.
*It is essential to highlight larger rodents such as rats and squirrels can damage the outer frame, so we recommend that any active infestations are controlled before the application of the vent guard.
Download our latest instruction sheet
Click here to download the latest instruction provided to assist with the application of the air vent cover.
Watch our introduction & installation video
This video provides information on our vent and how to install the vent over an air brick vent.
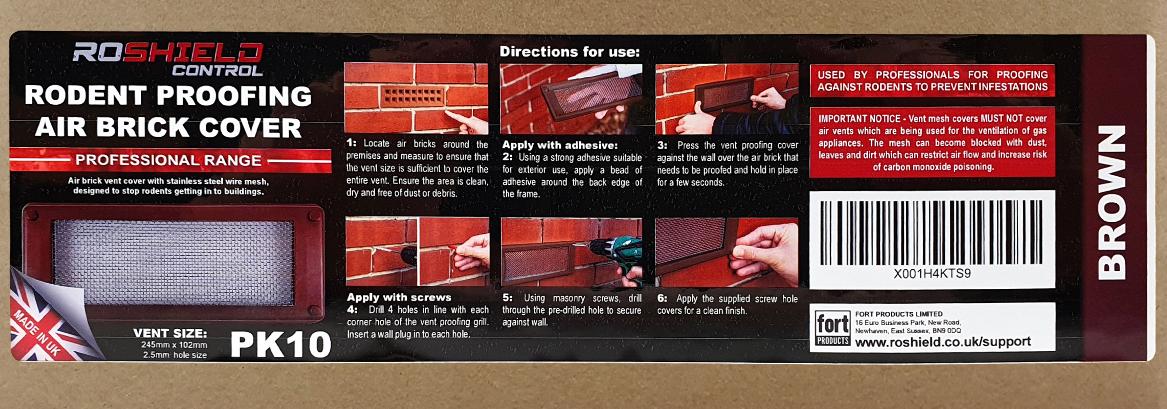
How to install the vent cover with adhesive:
Tools required: Caulking Gun, Knife
Fixings required: Adhesive suitable for vent application
Time for installation: 1-2 minutes per vent!
Step 1
Step 2
Step 3
Step 4
How to install the vent cover with Screws:
Tools required: Drill, 5mm Drill Bit, Screwdriver PZ1
Fixings required: Basic BZP fixing kit supplied per vent cover
Time for installation: 5 minutes per vent